|
|
Post by monkeyjim on Feb 19, 2007 21:42:33 GMT
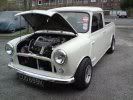
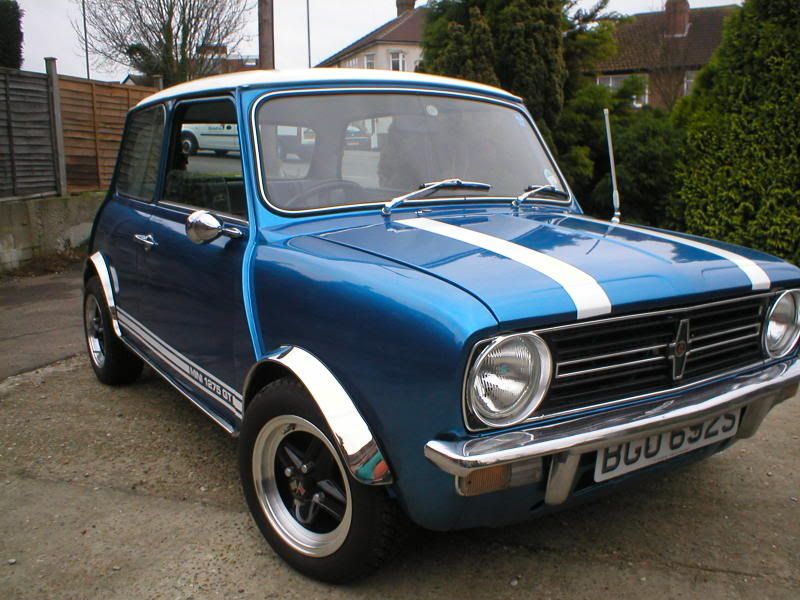
Got a rusty N reg sidewalk Limited edition for my daughters first car .
It only needed new sills and a A panel. Or so it looked from the outside .
The work has taken 2 days and uncovered some horrors such as badly repaired damage to the Drivers wing, 'A' panel and door post plus a escalation in the rust . So it has has actually needed:
Both outer sills ,
Repair work to both inner sills
Repair work to underside of floor along sill line both sides
Door step seam re-making on drivers side
Repairs around door check strap hole in body
A panel drivers side
Repair to drivers door post ,
Inner wing repair sections.The Inner wing should weld onto the door post but on the drivers side the inner wing was 2 inches short of that welded joint due to rust .
There was a large hole around the drivers side fresh are vent on the dash. This rust is the continuation of the above inner wing corrosion . The vent was keeping the crispy bits together so the area around that needed repairing and off coarse the vent retaining screws were seized and sheared off as they frequently do .
Repairs to both front corners of the floor/rear of front wheel arch .
This was a Mini death trap. The A panel, sill and front door hinge post area of this Mini was so weak even a light impact in this area would have been disaterous for the driver.
Pictures to follow .
Alex now has a clean up job to do . Plus the inner sills and floors need rustproofing and a coat of paint , and the entire interior needs putting back.
My next job is to coat and paint the outer sills , seal up some welded joints , skim of filler on the rear edge of the A panel , etch prime and paint the drivers doorstep and A panel . Will be doing that with spray cans , no budget for bodyshop on this one .
Dave
|
|
|
|
Post by paul1275s on Feb 19, 2007 21:49:08 GMT
keeping you busy by the sounds of it! thats why i'm holding off starting my red one for now, i just know it's going to escalate from the couple of panels i intend to replace at the moment... and it's got to be ready for riviera run!
|
|
|
|
Post by oldgit on Feb 20, 2007 9:45:25 GMT
Sounds like Alex and Sarah need to get together both got the same Job to do ;D ;D ;D
|
|
|
|
Post by monkeyjim on Feb 21, 2007 20:49:50 GMT
Both Sarahs and Alex's need to be ready for Riv Run.
I will use Alex's if I do not take MK1 ;D ;D
Got some other issues to sort out :
Drivers front wheel rubs on wing , hopefully that is the nylon cup on the top arm .
Misfire ........ hope thats only clockwork plugs or leads and not a piece of electronic crap. Got the scanner at work. Hope I do not need it .
Handbrake comes up high and it will need a service.
Sure I did the brakes a couple of years ago at work for the last owner so should not find seized adjusters .
d
|
|
|
|
Post by monkeyjim on Feb 26, 2007 22:26:16 GMT
This is the area around the drivers side fresh air vent from the drivers seat 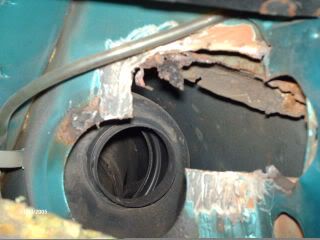 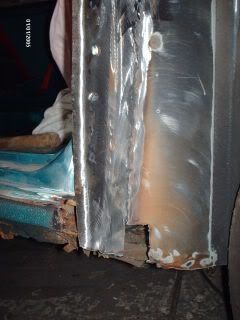 A panelremoved , this is the bottom of the drivers side door hinge panel . The hinge panel has been re-attatched to the inner wing in this pic. ![]() repairs .http://i81.photobucket.com/albums/j221/monkeyjim_photos/Camera2393.jpg[/IMG] floor, inner and outer sill repairs 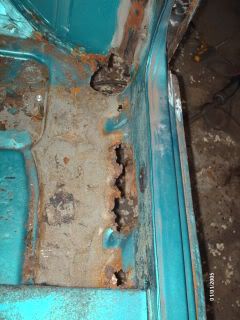 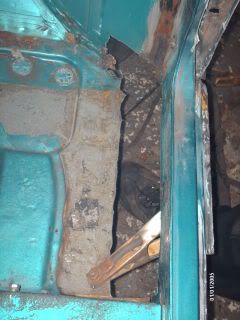 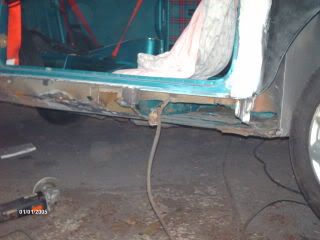 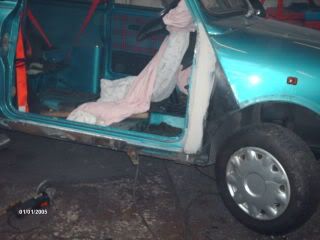 I got Alex to prime the bare metal with red oxide primer and on the inner sills she sprayed black top coat on to cover the oxide primer. The colour of the inner sills will not be noticed as she re-fitted the carpets which are also black . I sprayed the outer sills, door step, hinge panel and A panel with the Kingfisher blue top coat , courtesy of Halfords. Then I applied the clear laquer to required areas. This all went well until half way through the Apanel . The laquer started comming out like de-icer from a tin and wrecked the finish by giving it a heavy orange peel affect .  Oh well, it looks like I have got a bit of wet flatting to do next weekend to get the finish smooth . I also T-cutted the car and polished at the weekend . The car did look ok to start with but the T-cut has really improved it some more . D |
|
|
|
Post by MiniHaven on Feb 27, 2007 7:55:28 GMT
nice one dave , good to see you at it mate .
|
|
|
|
Post by MiniGT5 on Feb 28, 2007 12:11:57 GMT
Looks like a fairly standard amount of rust there... my cooper looks the same just got to get it patched up like that
Nice one
N :-)
|
|
|
|
Post by monkeyjim on Feb 28, 2007 18:54:09 GMT
Apart from the crusty outer sills and A panel all looked ok . Until we took the carpets out and removed the A panel  |
|
|
|
Post by monkeyjim on Mar 10, 2007 23:01:06 GMT
This week I have
Put the interior back together .
Found the handbrake cables were seizing in the quadrant that is welded to the front of the rear subframe , sorted that .
Sorted the misfire by throwing the Chapion spark plugs in the bin and fitting some NGK'S .
Took it to my brothers place for its MOT....... it passed ok .
All I need to do now is :
Service it
Replace the worn nylon cup in the offside front suspension arm because sometimes the wheel rubs due to the lower ride height .
And re-align the exhaust system , it sags down at the cat to rear section joint because there are no washers behind the fixing nuts and as a result the nuts have eaten into the stud holes in the flange . New washers and exhaust assembly paste will sort that .
So as the mk1 will not be ready for Brooklands I may take the Sidewalk .
dave
|
|
|
|
Post by monkeyjim on Aug 26, 2007 21:03:33 GMT
Finally got round to sorting out the wheel rubbing on the drivers front wing , as you can see from the above pics its running standard wheels and tyres so its not due to those . I was convinced it was a knackered doughnut but as I did not have one I did have a new nylon cup and ball joint knocking around my tool box at work so a few months ago I put the new cup in the top arm and replaced the ball joint in my lunch hour . Unfortunately it did not cure the prob , was hoping the cup had no bottom in it and the ball was worn but both were not to bad . It could only be the rubber spring at fault . This week whilst clearing out the garage I came across a used pair and one was in excellent condition . It might be old but it has not gone out of shape . I would normally only put new ones in but thought i would give it a try as it looked so good . Glad I did. Look at the garage find compared to the one on the right I took out , no wonder the suspension was low . 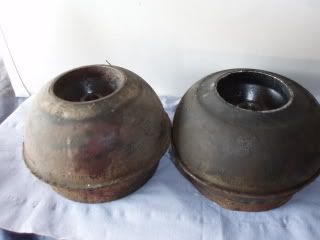 If someone tells you to fit HiLos to sort rubbing tyres on bodywork , ignore them until you have checked the condition of your rubber cone springs first. If knackered they will also lower the ride height 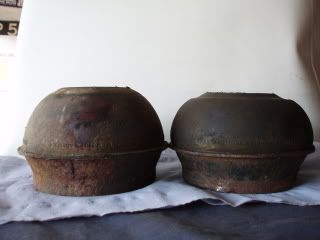  ;D |
|
|
|
Post by monkeyjim on Sept 5, 2007 23:04:15 GMT
Over the last week I have replaced the front shock absorbers , front discs and pads, cleaned out and adjusted the rear brakes and balanced the front wheels.
It is not a bad car to drive now that its smoother over bumps , does not vibrate at 60mph and stops without juddering ;D
Still gutless though, but its happy to sit above motorway speeds and takes whatever you throw at it so suppose I cannot crumble much.
|
|
|
|
Post by MiniHaven on Sept 13, 2007 18:43:06 GMT
nice work dave .
|
|
|
|
Post by monkeyjim on Sept 18, 2007 21:40:32 GMT
New uprated lower arm and tie rod bushes turned up today to replace the knackered originals , hopefully helping to sort the way the car pulls under accelerating and braking. Already got new uprated subframe mounts , did try and fit the tower ones the other lunchtime at work but as it took me so long to remove the ECU due to corroded fixings I ran out of time before I had to get back to work.  Sorted the ecu fixings and relocated the horn and its bracket to make life a bit easier next time. Am now able to see the clutch slave cylinder, previously hidden away. |
|
|
|
Post by Simon1275mpi on Sept 18, 2007 22:02:42 GMT
Funny you should say that, Matilda has been pulling to one side recently...
|
|
|
|
Post by monkeyjim on Sept 21, 2007 18:30:20 GMT
Fitted the uprated lower arm and tie rod bushes to the drivers side of the car one lunch during the week all went well , nothing seized ;D which makes a change on this one  Was going to replace the passenger side the following lunchtime but did not get a chance to do the passenger side as there were no ramps free to put the car on .. no point making life hard for yourself on the floor if the gear is there., So I thought I would tackle the knackered top steady bar bush's. What a nightmare      ... the bolts on the engine end of the bar were ok to undo . The head of the bolt at the body end of the bar was rounded off. So after a lot off messing around trying to get it off I got the plasma cutter out and eventually cut the head off it ;D But the bolt itself was seized solid in the metal spacer tube that goes through the bush. That lot had taken all lunchtime , so i was not best pleased. Had to borrow the works van to get home. So this morning I went into work early to make a start on the darn thing . I removed the ECU , unbolted the brake master cylinder from the servo and then removed the servo itself . Also removed the clutch pipe from Clutch Master to aid access . At lunch I used a mini grinder to start cutting the bolt, luckily under all the rust the nut on the end of the bolt was a nyloc and the heat from the grinder melted the plastic and the nut came undone quite easily . Made life a lot easier . Still took all linchtime to remove seized bolts and fit the steady bar with its new uprated bush kit. All bolts got a coating of Copperslip to stop seizure. ......... Incidentally a automatic spec bar is used on injected Mini's . They are longer than the manuals and have ribs along them That left about half a hour after work to bleed out the clutch and put the bits and pieces back in . Glad I do not need to do that one again . |
|




 Oh well, it looks like I have got a bit of wet flatting to do next weekend to get the finish smooth .

